
How to Remove Window Tint | Step-by-Step Guide + Premium PPF Upgrade
How to Remove Window Tint: A Complete DIY Guide
Window tint can enhance privacy, block harmful UV rays, and improve the look of your vehicle or home—but over time, it can bubble, fade, or peel, making it more of a headache than a benefit. Whether your tint is old, scratched, or simply outdated, this guide will walk you through how to remove window tint safely and effectively.
Plus, if you’re looking to upgrade after removal, we’ll introduce a modern alternative—TERMINAX Carbon-X™ Fiber PPF, a next-gen solution that offers protection, performance, and aesthetic enhancement beyond traditional tint.
Why Remove Window Tint?
There are several reasons you might need to remove your window tint:
- Bubbling or peeling film due to age or poor installation
- Discoloration or fading that reduces visibility
- Upgrading to better protection, like high-performance PPF or ceramic tint
- Legal compliance if your tint is too dark for your local laws
- Selling the vehicle and wanting a clean, fresh look
Whatever the reason, the key to a clean result is using the right method and tools, so let’s get started.
Tools You’ll Need to Remove Window Tint
Before beginning the process, gather the following tools:
- Heat gun or hairdryer
- Spray bottle with soapy water or ammonia solution
- Razor blade or utility knife
- Microfiber cloths
- Garbage bags or black plastic sheets (optional)
- Window cleaner for post-removal cleanup
- Protective gloves (especially when using ammonia)
How to Remove Window Tint: Step-by-Step
Step 1: Soften the Adhesive with Heat
Use a heat gun or hairdryer on a high setting to warm the surface of the window tint, starting from one corner. Move the heat source back and forth about 3–6 inches from the film to avoid damaging the glass.
As the adhesive softens, use your fingernail or a razor blade to lift the edge of the film gently.
Step 2: Peel Off the Tint Slowly
Once the corner is lifted, slowly peel the film off the window at a consistent angle. Take your time to avoid tearing it. If the film resists, apply more heat and retry.
Some cheaper or older films may come off in small pieces—don’t worry, the remaining adhesive can be cleaned in the next step.
Step 3: Remove Leftover Adhesive
After the tint is removed, you’ll often find a layer of glue still stuck to the glass. To get rid of this:
- Spray the adhesive with a solution of soapy water or ammonia.
- Let it soak for 5–10 minutes (you can cover the window with plastic or a trash bag to trap heat and moisture).
- Use a razor blade at a shallow angle to gently scrape the glue away.
- Wipe clean with a microfiber towel.
- Repeat as needed until the surface is smooth and clear.
Step 4: Final Cleaning
Finish by applying a high-quality glass cleaner and wiping with a fresh microfiber cloth to remove streaks or smudges.
Your window should now be completely clean and ready for a new application—or left clear, if that’s your preference.
Common Mistakes to Avoid
- Don’t rush the process. Peeling off the film too fast may leave behind more residue or tear the film.
- Avoid using metal razors on defroster lines (especially on rear car windows), as this can damage them.
- Never use ammonia in enclosed or poorly ventilated areas. Always work with open windows or outdoors.
- Don’t skip adhesive removal—leftover glue can cause problems if you plan to install new film or coatings.
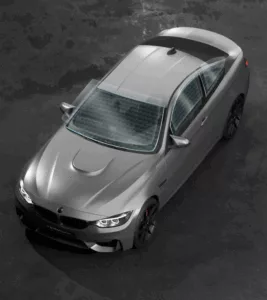
After Tint Removal: Consider Upgrading to Carbon-X™ Fiber PPF
Now that your windows are clean, it’s the perfect time to think about a long-term upgrade. If you’re removing tint because it was faded, cracked, or ineffective, don’t just replace it with another film that may break down over time.
Instead, consider a premium protection solution like the TERMINAX Carbon-X™ Fiber PPF.
Why Choose Carbon-X™ Fiber PPF?
Unlike traditional tints, Carbon-X™ Fiber PPF combines advanced protection with a sleek, carbon-textured look. Here’s why it stands out:
High Durability & Longevity
Carbon-X™ is built with a fiber-reinforced TPU base, providing excellent resistance to scratches, wear, and UV damage. It lasts much longer than typical tint films, especially under harsh weather or high-use conditions.
Aesthetic Enhancement
The carbon fiber finish gives windows, trims, and other surfaces a modern, premium appearance—perfect for automotive enthusiasts who want style and function in one.
Thermal & UV Protection
While it isn’t a traditional “tint,” Carbon-X™ offers heat rejection and UV shielding, helping maintain interior comfort and prevent sun damage.
Self-Healing Technology
Minor scratches and marks self-heal with heat, ensuring your window surfaces remain clean and smooth for years.
Easy Maintenance
Hydrophobic and stain-resistant properties make cleaning fast and effortless—just rinse and wipe.
Multi-Surface Application
Not just for windows—Carbon-X™ can be applied to mirrors, pillars, interior trims, and even painted surfaces for a uniform, protective aesthetic.
When to Choose Tint vs. Carbon Fiber PPF
| Feature | Traditional Window Tint | Carbon-X™ Fiber PPF |
| UV & Heat Protection | Good | Excellent |
| Scratch Resistance | Low | High |
| Aesthetic | Shaded look | Carbon fiber texture |
| Durability | 2–5 years | 5–10+ years |
| Self-Healing | No | Yes |
| Installation Areas | Windows only | Windows, trims, interior, exterior |
If you’re looking for more than just shade and want premium texture, durability, and protection, Carbon-X™ is the smart upgrade.
Final Thoughts
Removing window tint isn’t as complicated as it seems, especially with the right tools and technique. Whether your goal is to clean up old film or prepare for a new upgrade, taking a careful, step-by-step approach will give you the best results.
And if you’re considering a powerful, long-lasting alternative to tint, TERMINAX Carbon-X™ Fiber PPF delivers the durability, style, and modern protection today’s drivers demand.